


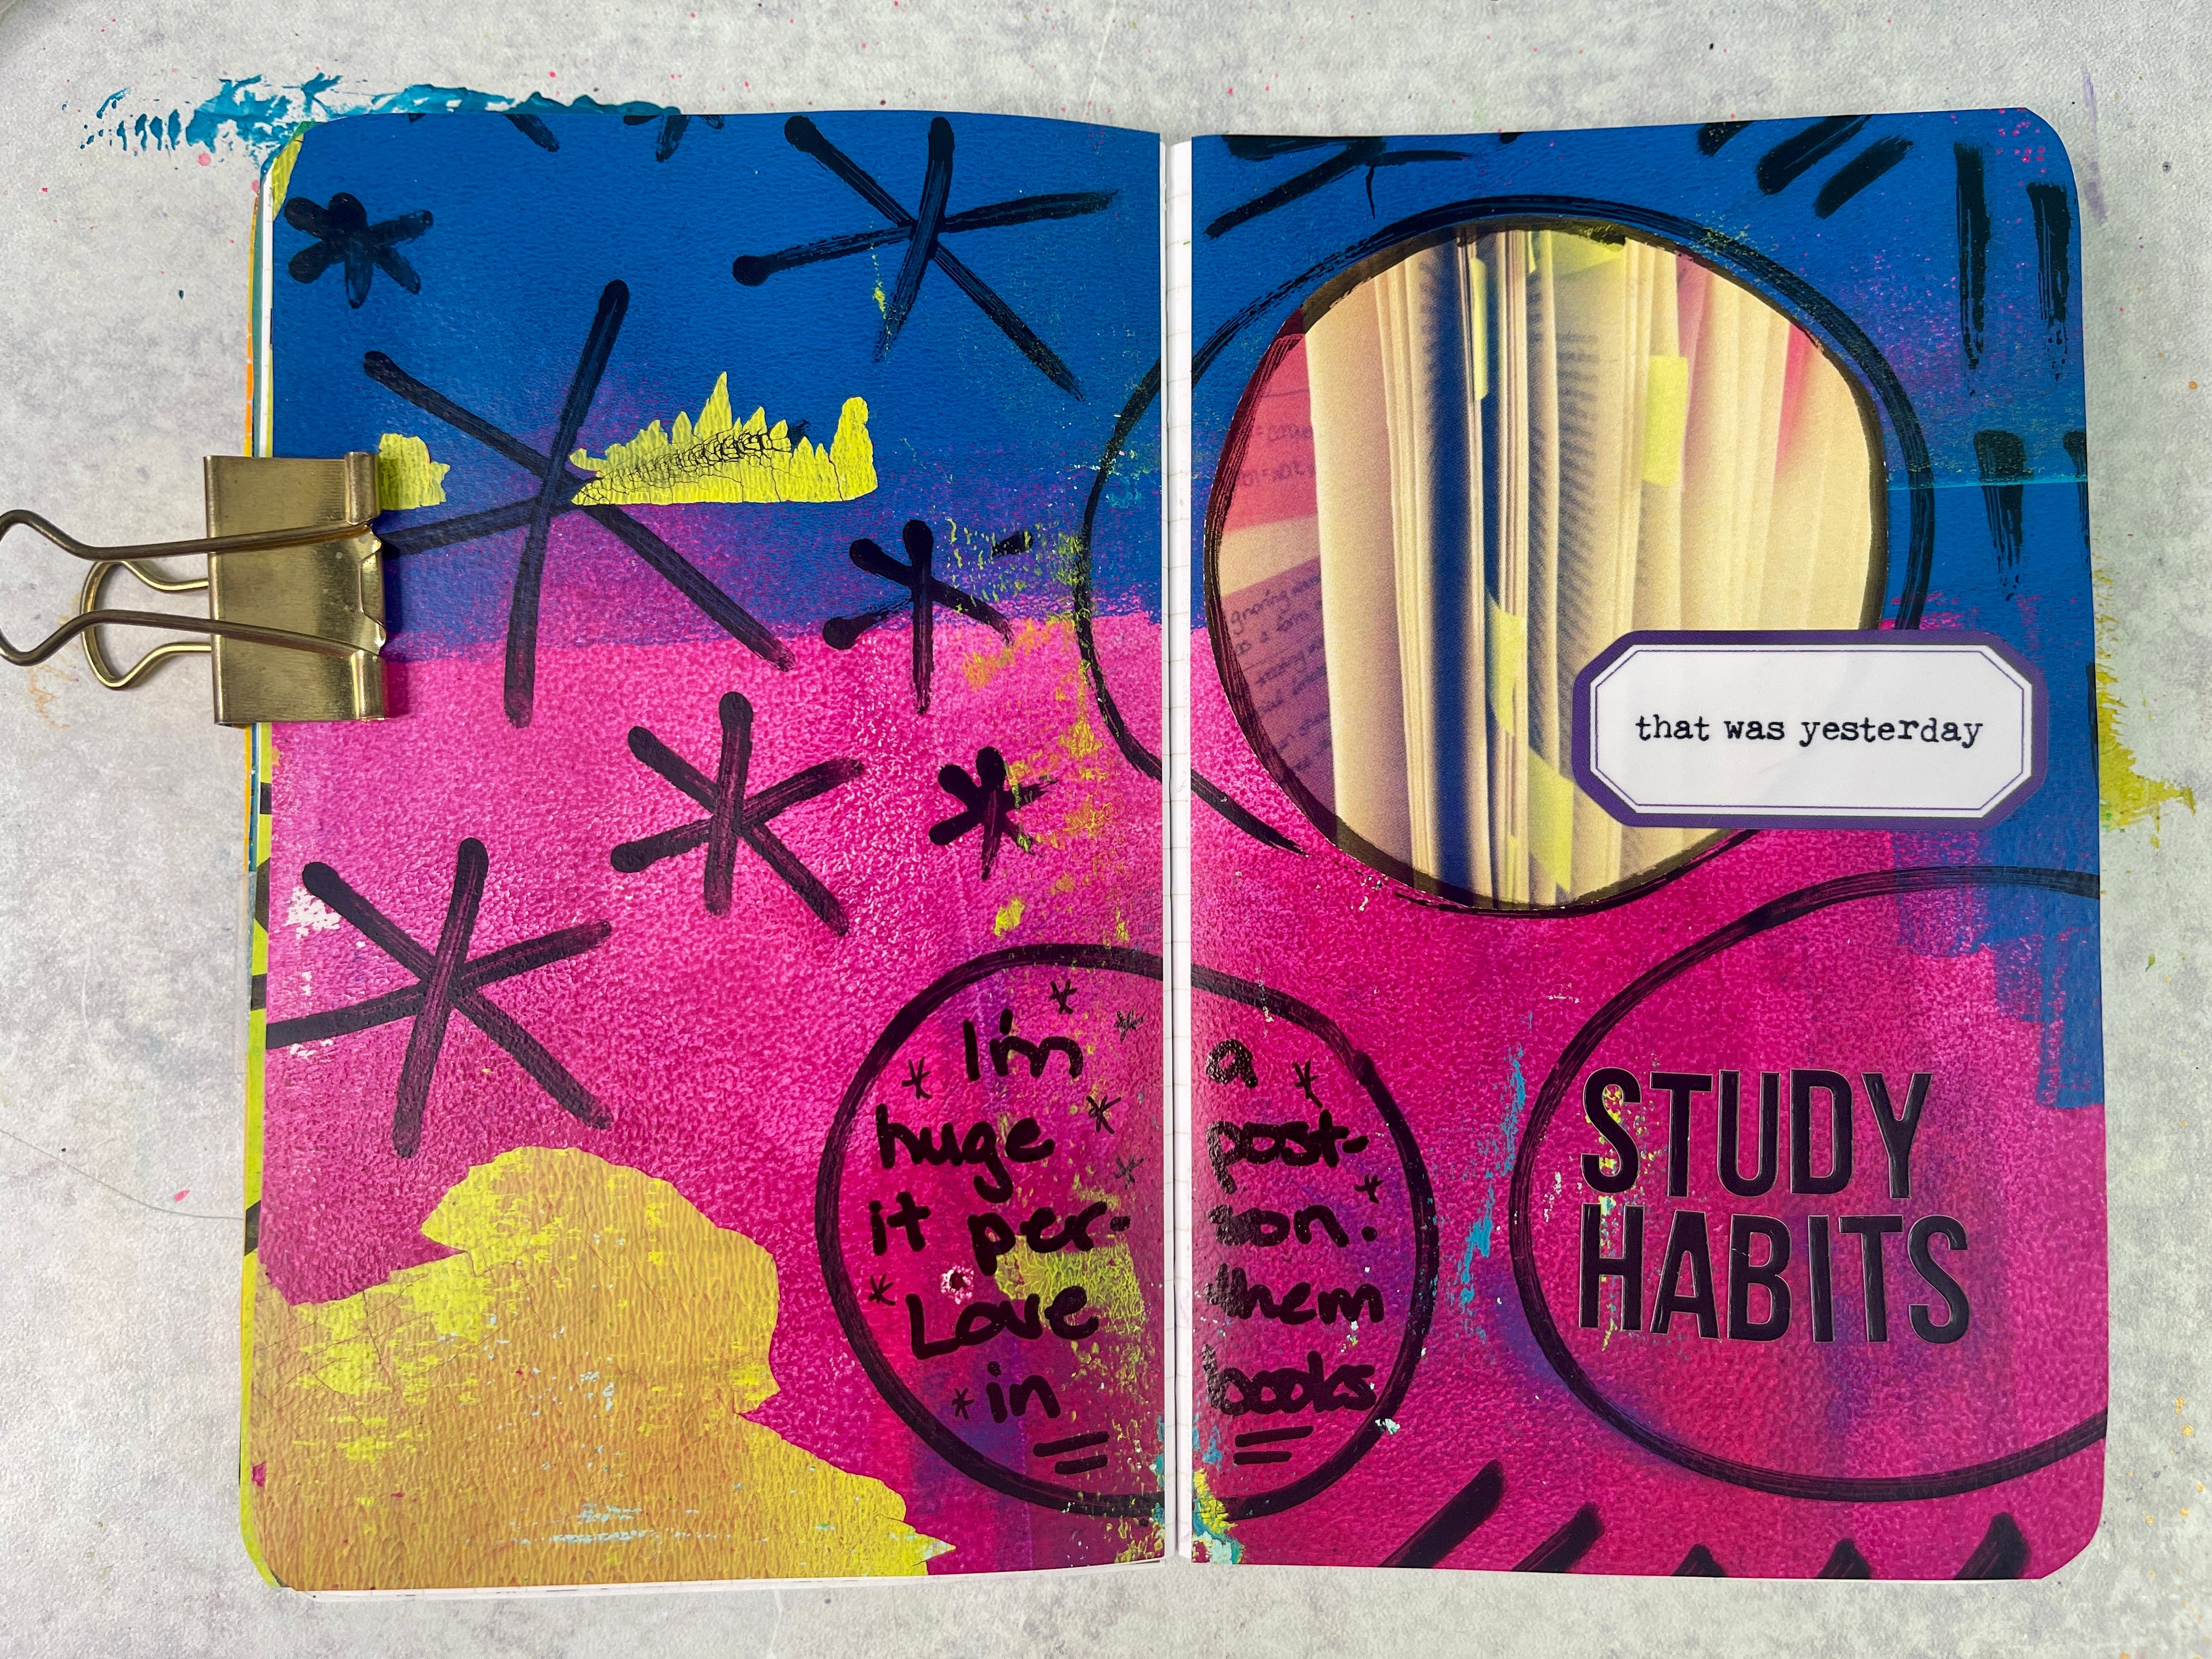
I love today’s page. After I was playing around with the gel prints and Sharpie Creative Markers in yesterday’s page, I wanted to pivot a little bit and see what it looked like when I used the marker on the gel print first—instead afterwards, like on yesterday’s page (see below).

.
Technique of the Day

This one came out pretty cool, and I love that I was able to turn it into a mixed media scrapbook page easily. I’ve got a fun ratio for scrapbook pages — one background paper, one accent paper, one photograph, a title, some journaling, and a few embellishments.
With this page, my background paper, accent paper, and embellishments were all done on the gel print first. So by the time I put my photo, title, and a bit of journaling on the page, I was completely finished. It would have taken even less time if I remembered where I put my letter stickers…lol.
Supply List
Gel Print — Stash
Stickers — Paper Person (discontinued)
This post may have affiliate links.
Tips & Creative Wisdom
Stick to a Simple Page Formula
Scrapbooking doesn’t have to be complicated. A solid structure—like one background, one accent, one photo, a title, some journaling, and a few embellishments—helps keep things easy and fun. Not to mention, your stories get told!
Pro Tip: Keep a list of your favorite go-to page formulas so when you sit down to create, you have an instant starting point.
**If you’d like to unsubscribe from these Daily Pages emails, but continue to get other emails, click here and learn how to update your settings to best suit your needs.

