Scrapbooking with a Kit: Freckled Fawn | September 2015

So today we're gonna talk a little bit about the Freckled Fawn embellishment kit club and the October Woodland kit. rukristin & Freckled Fawn go way back; we road-tripped once from Salt Lake City, UT to Anaheim, CA (with a pit stop in Vegas for incredible donuts). I've been a member of the Freckled Fawn Embellishment Kit design team since its inception in the summer of 2013 and have since collaborated on a number of rukristin for Freckled Fawn products, including stamps, washi, stickers, and more
This month's kit: October 2015: Woodland

This month I created:
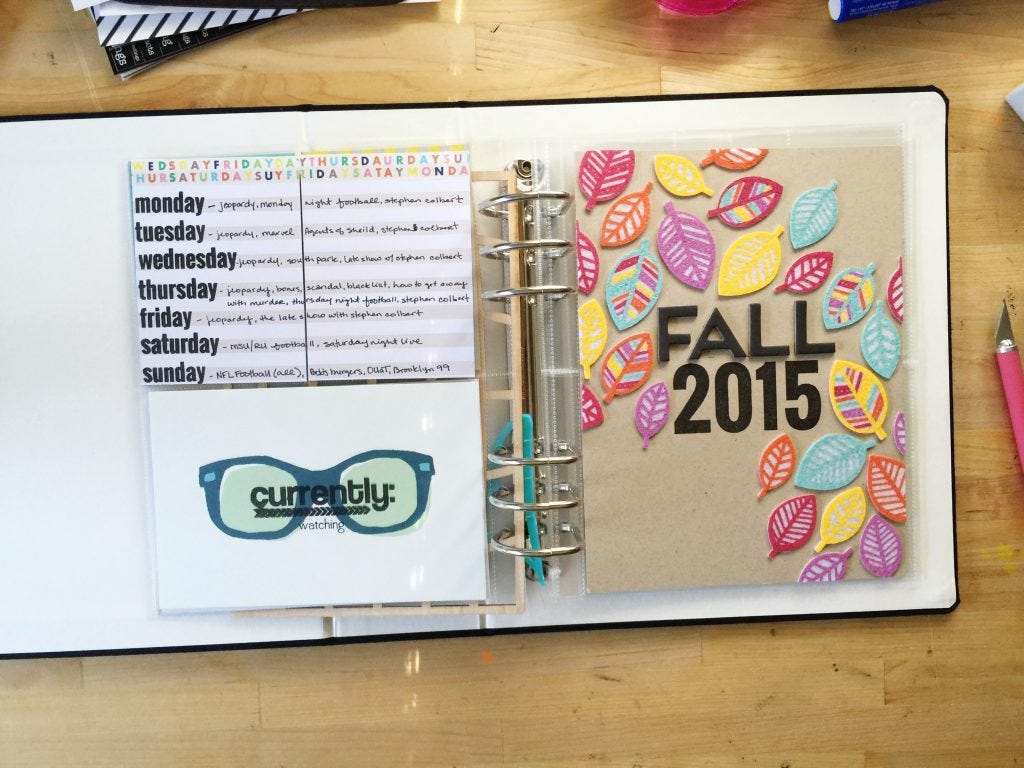
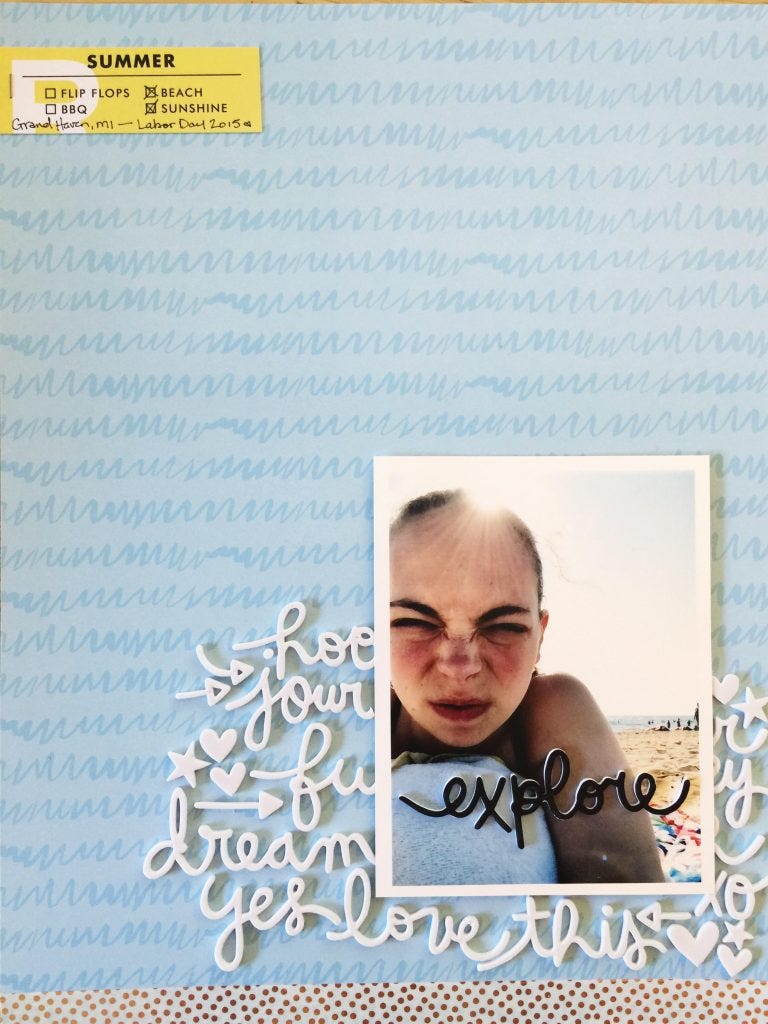
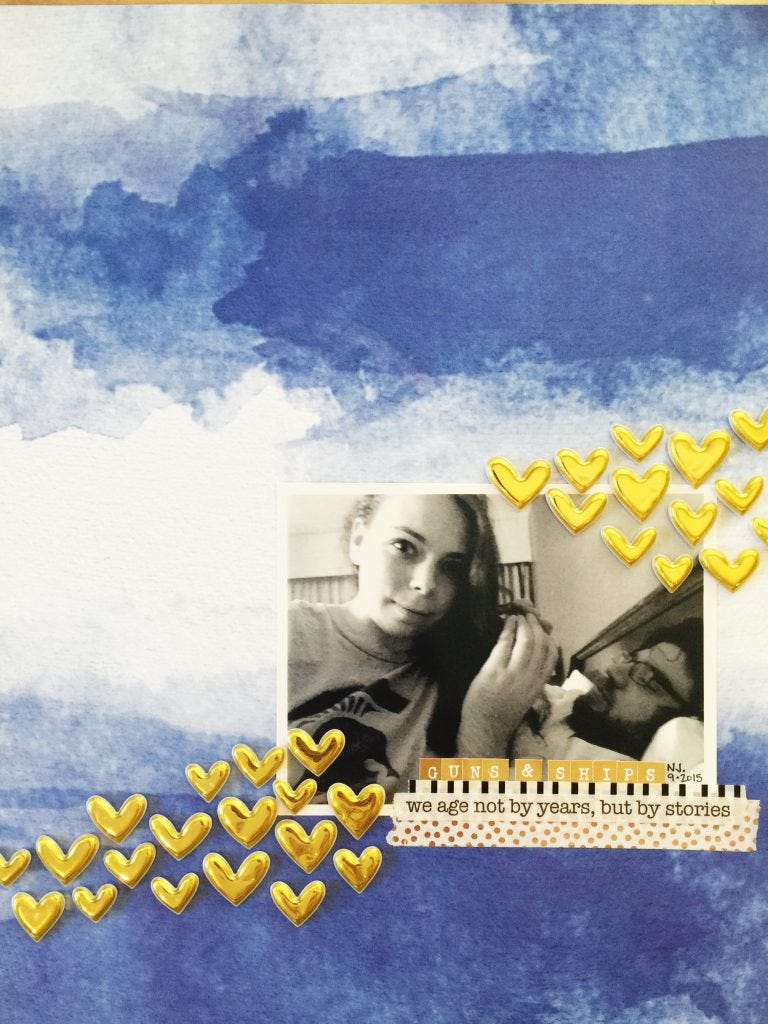
This month I created two 9x12 layouts and a 6x8 double-spread. You might have seen the double spread earlier this month, it was the project I shared for my first Awesome Ladies Project Scrapbook Challenge. Each of these projects features a large embellishment cluster as the focal point of the layout. Even though I used it in three varying ways, this technique is pretty easy to replicate.

In the first project, the embellishment cluster is radiating outward from the center title "Fall 2015". I accomplished this version of the embellishment cluster by first stamping the "2015" in the center of a blank sheet of 6x8 kraft paper. My second step was to adhere the "fall" alpha stickers above the stamped area.
Now that I was set with my title, I stuck down the leaf embellishment stickers. I started by adding one sticker underneath the bottom left corner of the stamped image and one sticker above the top right corner of the stamped image. I continued on by alternating the colors of the stickers and curating them to fit near each other as best as possible. I finished it off by trimming the excess leaf edges off the sides of the paper. This one looks so much cooler in person, I wish I could capture the awesome that is these felt leaf embellishments.

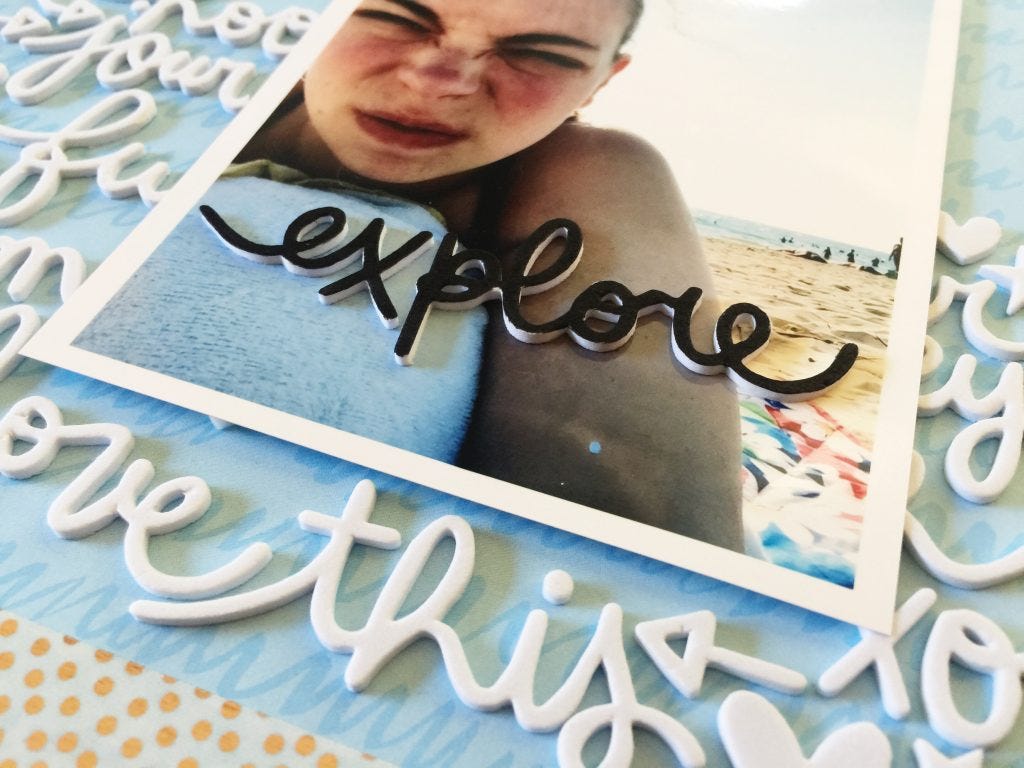
In the second project, I laid down the foam word stickers from the kit as photo matting. I used the stickers to create a text-art like background and then highlighted one of the words using a black paint marker.
To create this version of the embellishment cluster, I first took my photo and placed it on top of my patterned paper and marked off the space that it would occupy. I then stuck the word stickers all along the outside of that space, allowing only small bits of the stickers to be masked by the photograph. Because I was laying the outside of my photo on top of these 3-d sticker embellishments, I needed to reinforce the center of my photo with foam square adhesive so that it wouldn't buckle in the middle. I added the little icons stickers (hearts and arrows) around the edges to fill out the pattern and fill in the big holes left by the gaps in the letters.

My third project is probably the easiest embellishment cluster technique to learn, but also the hardest to master. This one is called the floating cluster effect. I wanted the hearts to look like little heart clouds that were floating across the photo of the two of us.
To achieve this version of the technique, I started out creating my layout as usual -- photo, washi, title. I left the embellishment cluster for last. Theoretically you can just start putting down the embellishments on top of the photo and let them trail off in whatever directions you want them to go in. Or you can be a bit neurotic and grab a ruler and figure out the line that you want your embellishments to follow. I do the ruler thing, but then I just keep that line in my head as I'm working on putting down the embellishments. If I think I'm getting off track, I can always grab the ruler again and see where I'm off.
Embellishment clusters are a totally awesome way to really emphasize a big theme in your project without words or photos. It's a great way to visualize the feelings behind a story without stumbling over awkward background information, or unnecessary words. Like -- clearly I'm super in love with the boy in that photograph. I don't need to write that out. Honestly, I don't even know where I would start with the words on that one, and sometimes fewer words translate to more story.

Favorite Embellishment:
Okay so I don't think I have a single favorite. I've been on this epic embellishment cluster kick -- so I've been using entire packages of embellishments on single layouts to make a really big impact, and this kit was perfect for that.
Thoughts about the kit:
I really enjoyed this kit a lot. I still have a couple of items left-over that I'm saving for other projects. The big wood star veneer is going to go into my summer small format Project Life(tm) album to document the Fourth of July. I'm holding onto the envelope embellishments and paper clips for some future penpal letters. I love that these kits have a bunch of little bits and baubles that I can share with my friends as well as slip into my scrapbooks.
Click here to learn more about the Freckled Fawn Embellishment kit club and see how you can get this lovely kit delivered to your door each month.
Check out my instagram feed for upcoming sneak peeks of next month's kit.

