


When you sit down to make a page, what do you reach for first? A photograph? A sticker you’ve been wanting to use? A piece of paper that’s been sitting on your table for a while? Any of those things can be your starting point. Pick one thing and figure out what you want to do with it as you go.
A couple of weeks ago, I wrote about what I mean when I talk about creative journaling, and the pictures, words, creative supplies, and bits of life that we can use in our notebooks. This week, I want to talk about starting a simple page with something you already have. I’ve got two pages to share, along with what I picked up first and how I decided what to do next.
When I sit down to make a simple page, I generally tend to start with some of my creative supplies. I usually grab something and give it a good look over before deciding how I want to put it down on my page. More often than not, I’ll wind up putting that supply down on the page first, unless the design of the page prohibits it; and if so—I’ll figure out what I need to do before I can put that specific supply down on the page.
There are lots of times that I know exactly what I want to say, and I physically start with a creative supply, even though I’ve mentally started with the story. Most of the time, though, what I want to say comes when I’m making, especially if I’m just playing around with stamps, gel prints, paint, washi tape, stickers, patterned paper, etc.
Starting with a stamp set
With this page, I wanted to try out a new stamp set that I got. It was called Plant Parent, and it was an outline and fill-in stamp set all about indoor plants.
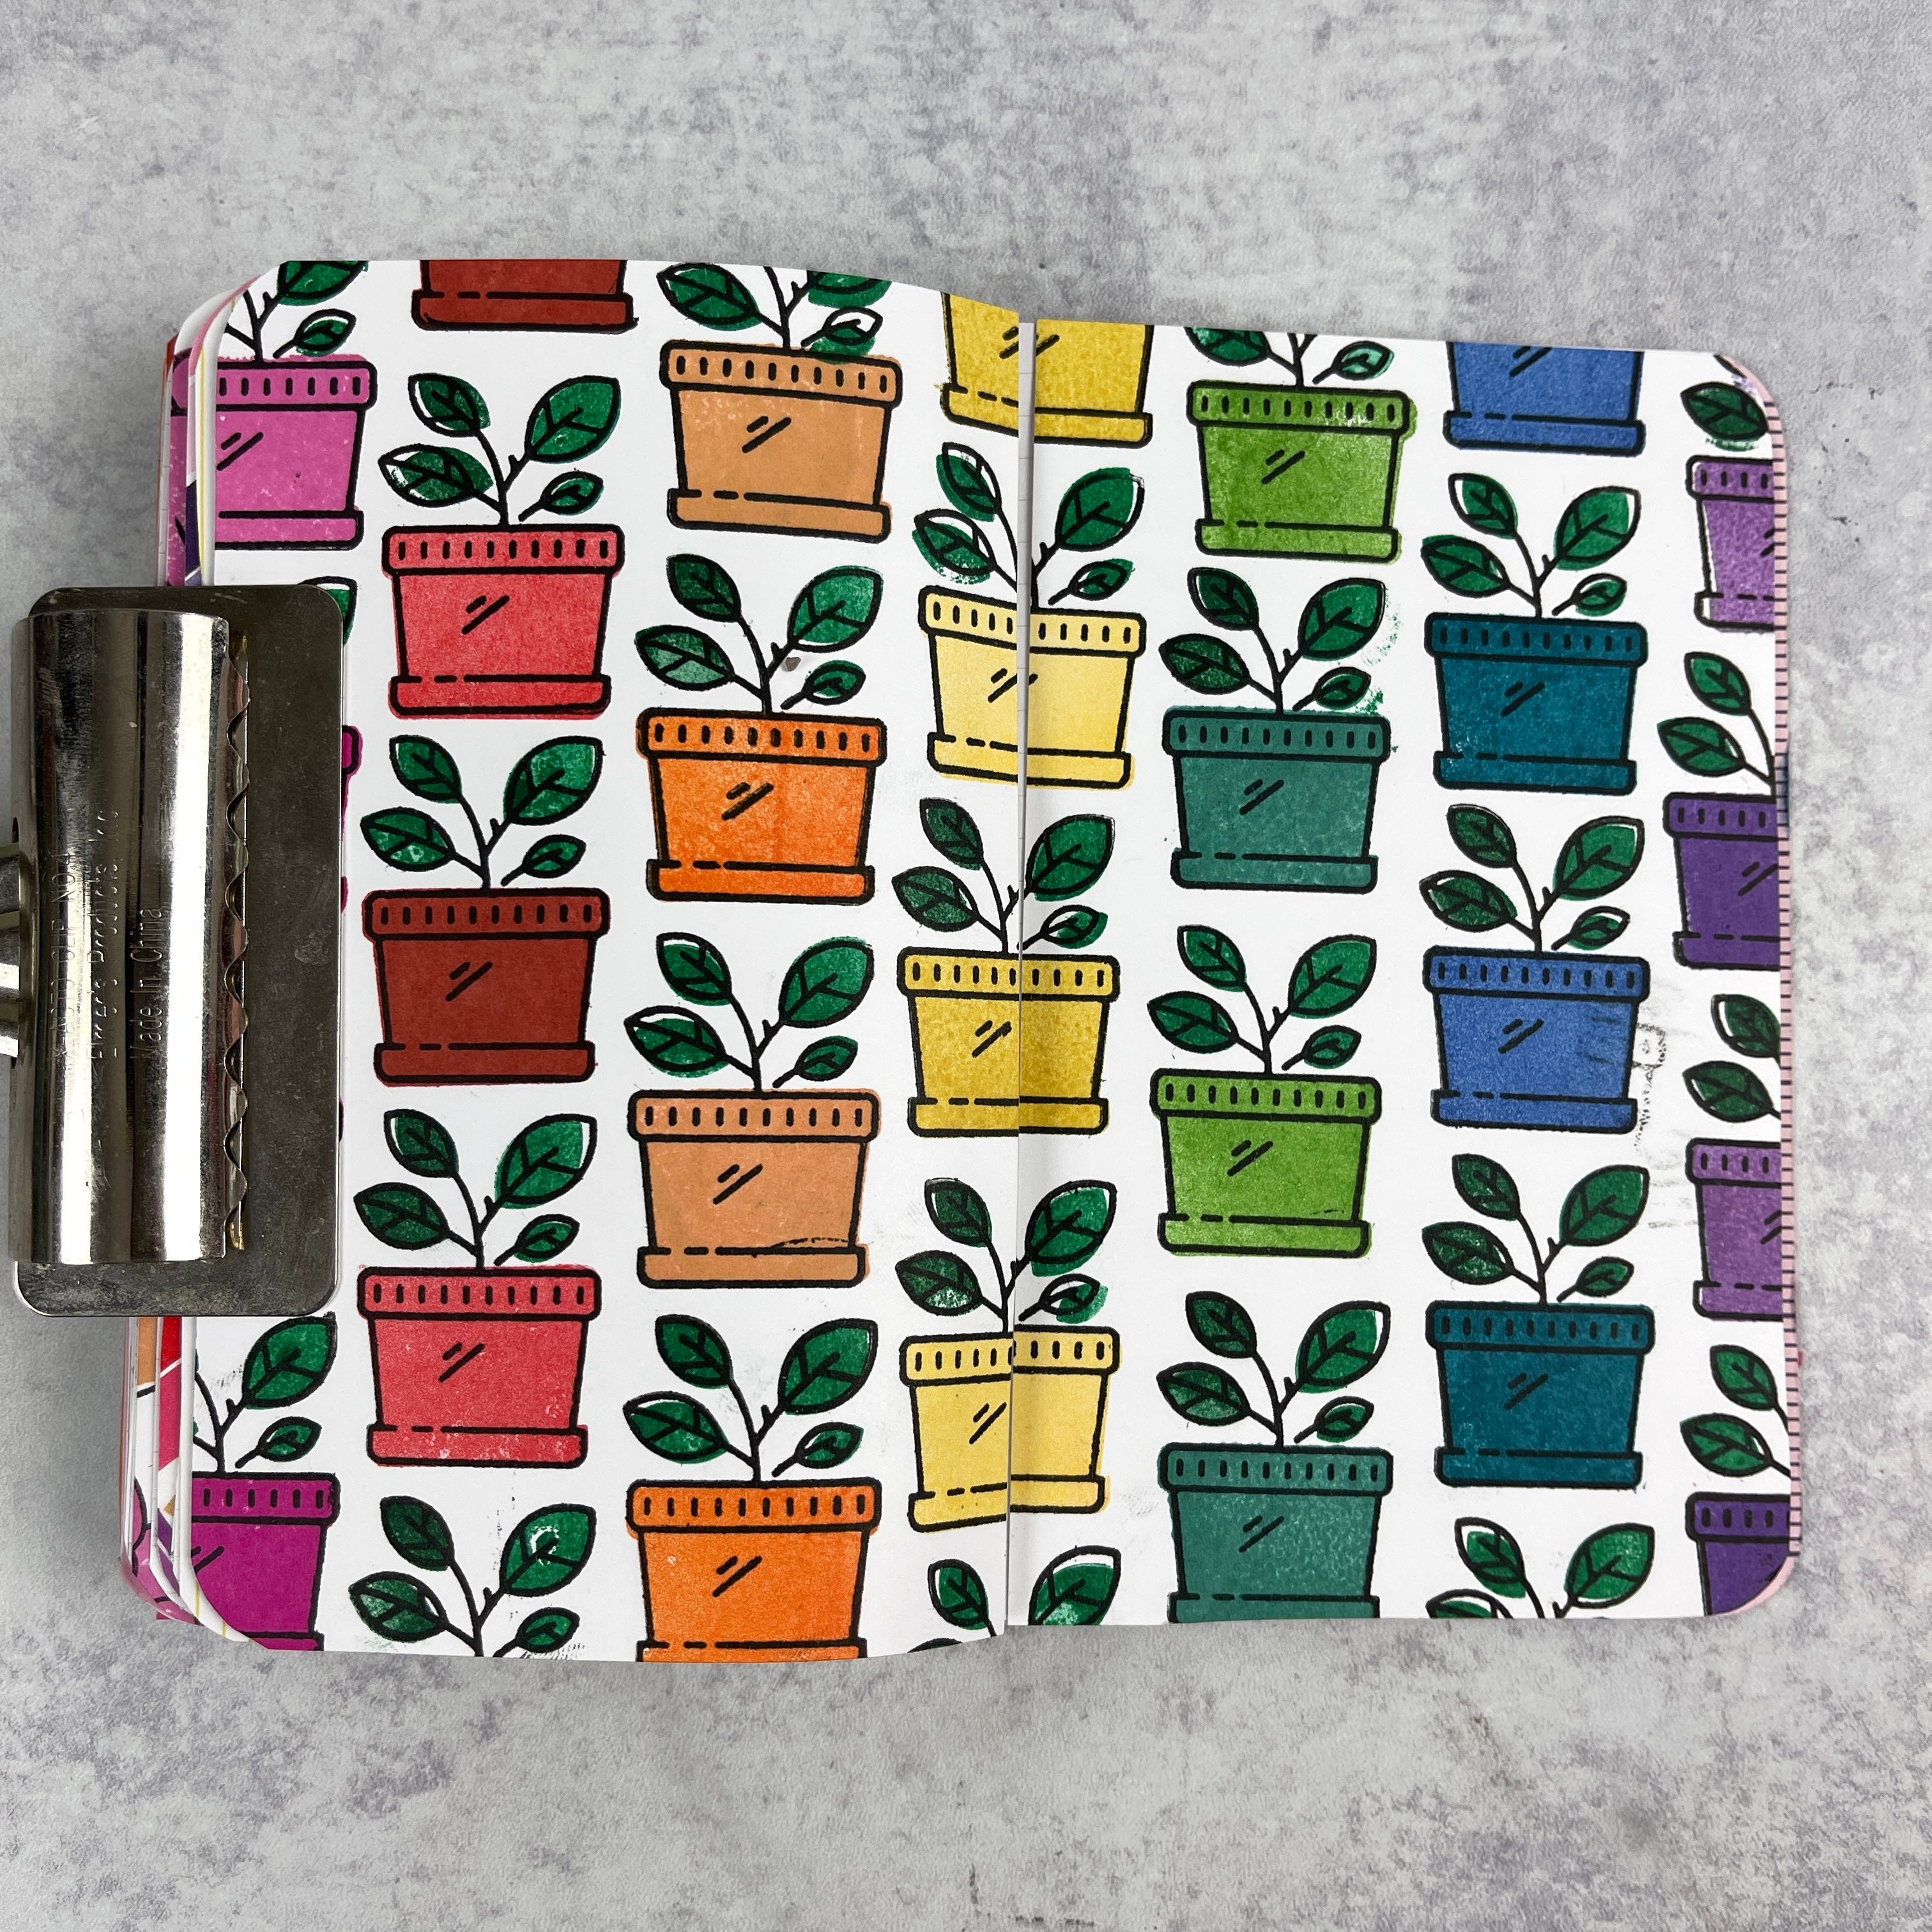
The first thing I did was take a look at the stamp set and figure out what I wanted my general page design to look like. I’m a huge fan of a repeating stamped background, so I took the outline stamp and stamped staggered vertical lines of the indoor plant on a sheet of white cardstock.
The next thing I did was pull out my set of different colored inks. I chose a color for each vertical line and then used alternating shades of that color for every other plant pot. You can see the difference in the colors if you take a close look. This let me play around with different colors, create a great rainbow, and make everything seem like it moves across the page without being too rigid.
To finish it up, I cut the white cardstock down to notebook size and glued it into my book. I could have stamped directly into the book, but I find that it’s much easier to stamp on a separate sheet of cardstock and then glue that into the notebook.
I think this page does a good enough job at saying “I’m a person that loves taking care of plants”. I didn’t need to write “I like plants” for someone to infer that from the page. The plants and the colors were what I wanted to put in my notebook, and that’s where I finished.
Starting with a quote
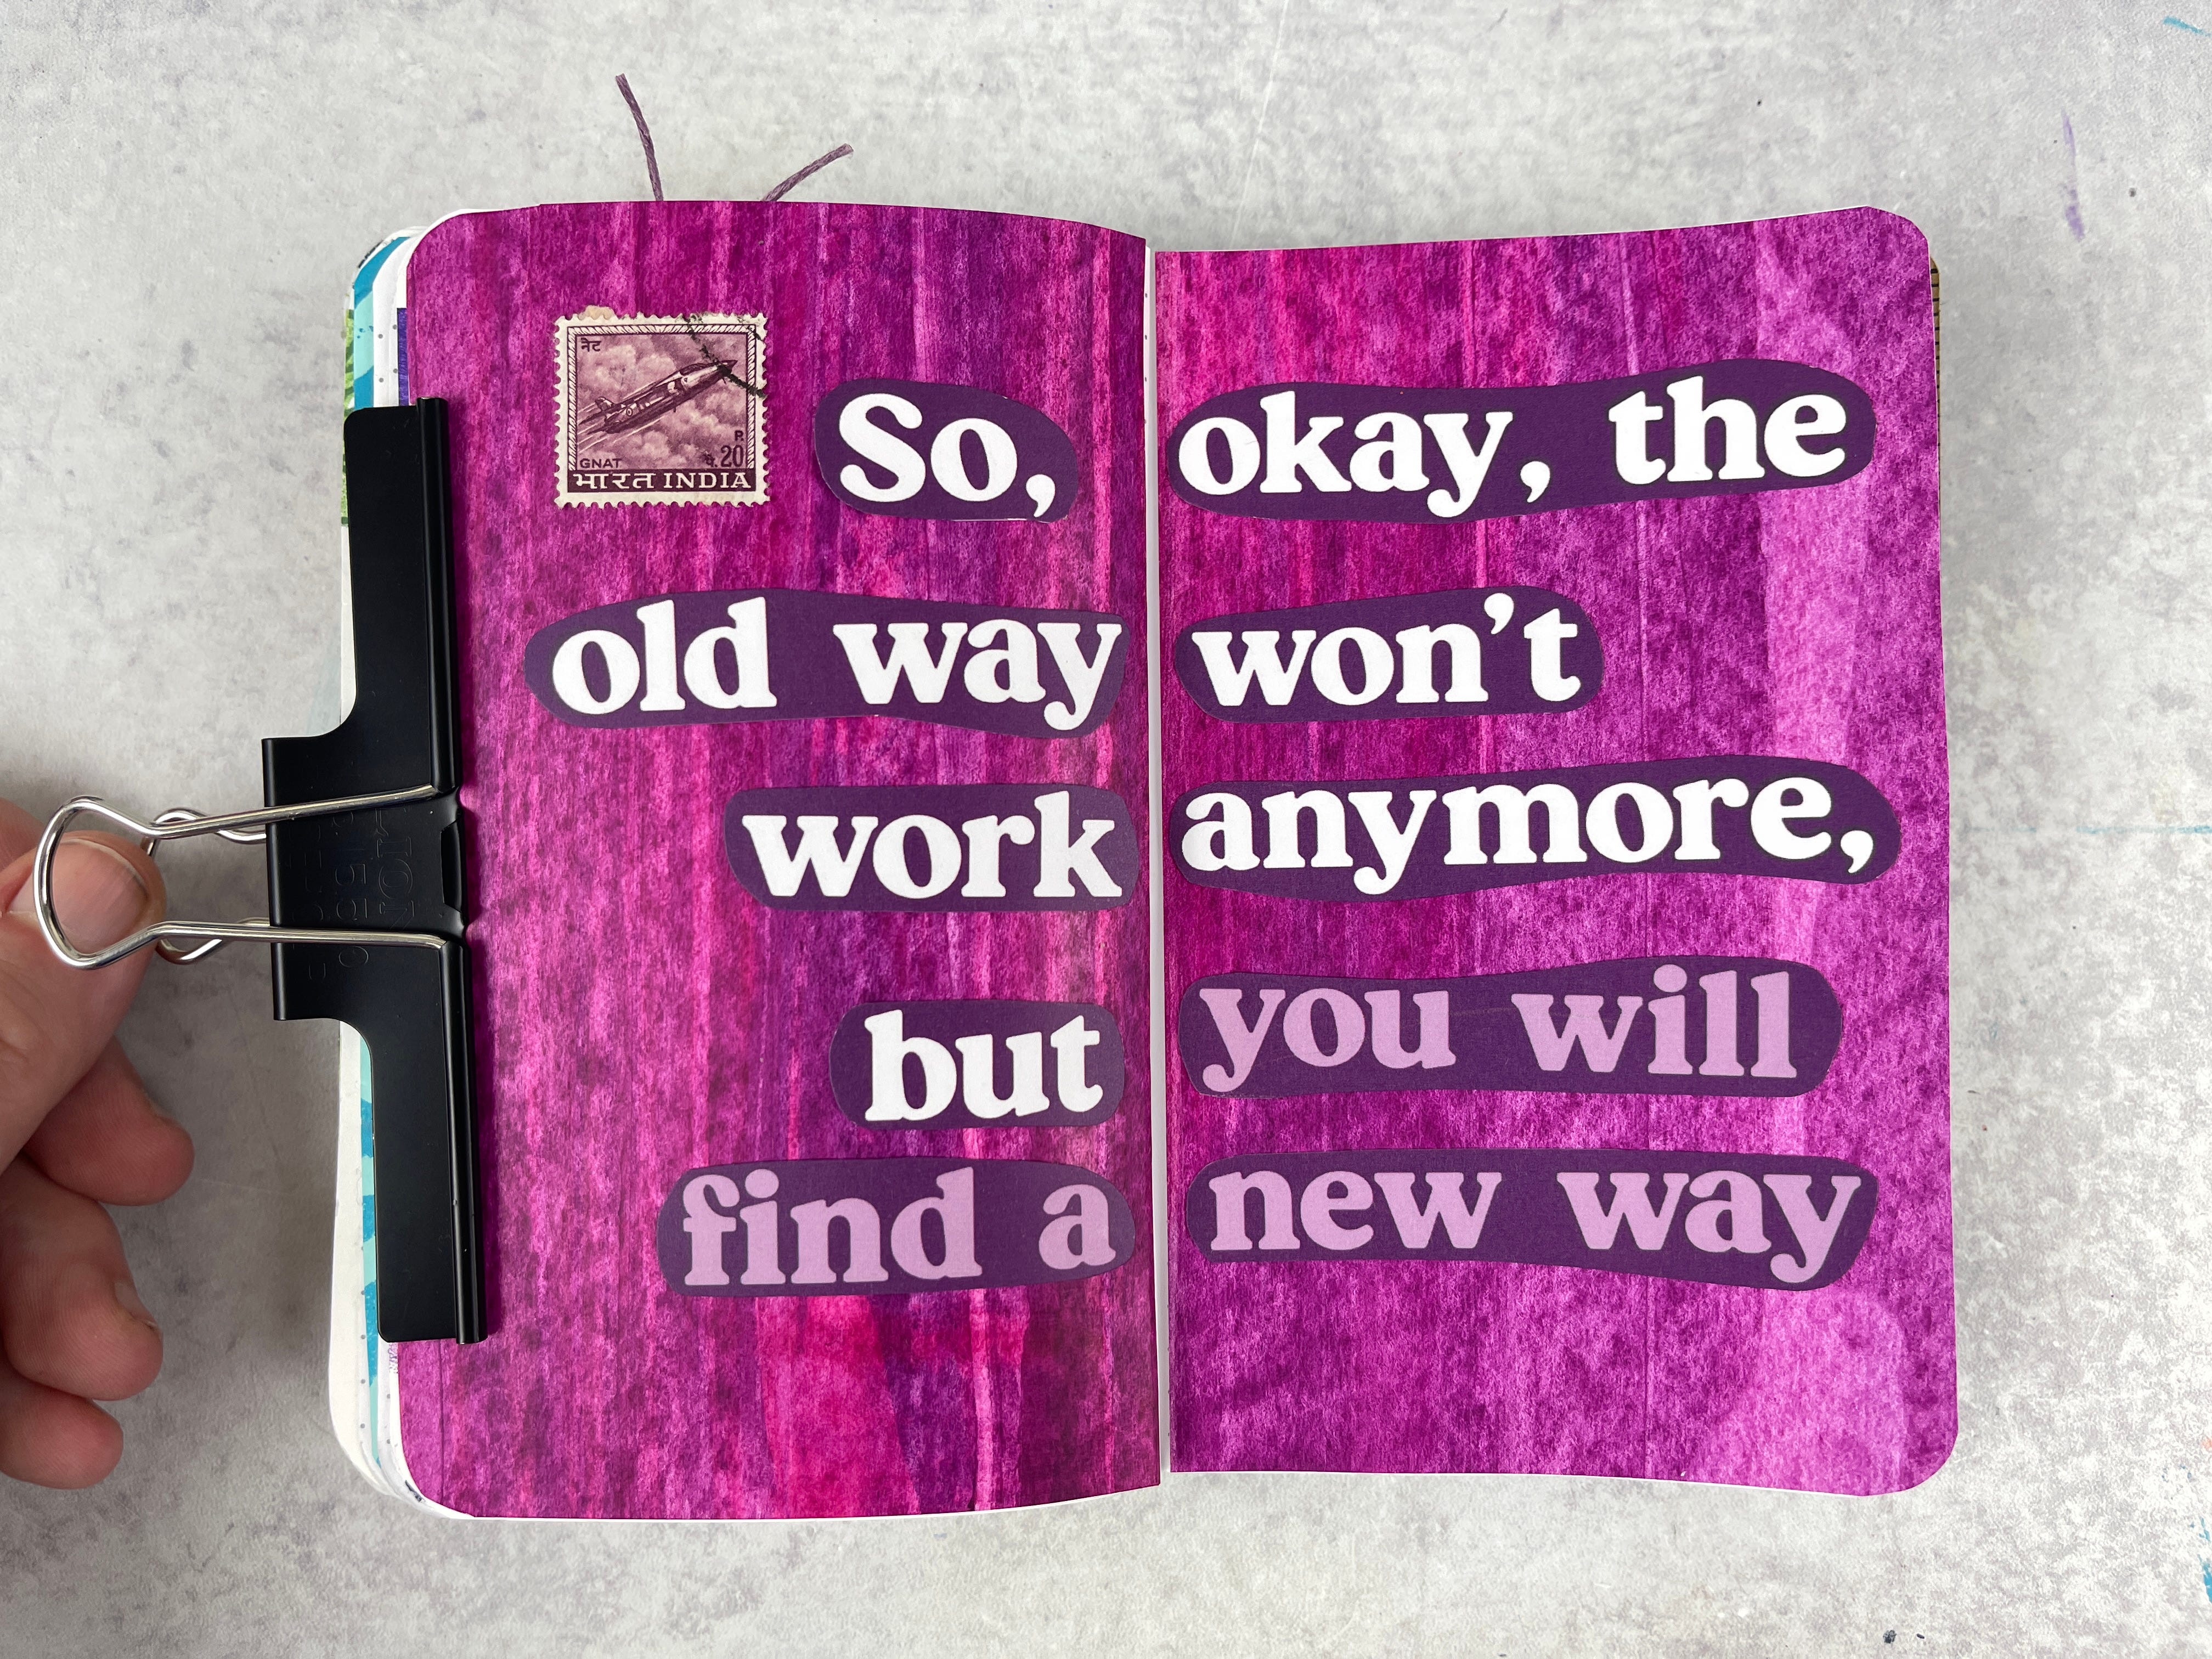
For this page, I started out with a quote from a Brandi Kincaid art print. I always go through my monthly Brandi envelopes and pick out the pieces that I know I want to use asap in my notebooks. I’m a huge fan of using new things when they’re fresh. A big part of it is so that I’m not “waiting around for the perfect project”—that can take up so much mental energy. And another part of it is that using the stuff that’s new and cool right now is a great way to indirectly document current trends going on right now, both in crafting/the world in general and my specific documenting as well.
So, to get started on this one—after I picked out the quote card—I cut out the words, leaving just a tiny bit of the purple background. I had my notebook open at the time to make sure things fit well, and then cut down the quote so that I’d have one strip of words on either page, which meant that a few strips had two connected words.
Once I had cut everything out, I went looking through my stash of gel prints to see if I could find anything in the purple family to coordinate with the background color of the quote and the lavender letters at the end. I picked out one that I think wound up matching pretty well. After I put everything together, I cut down the gel print to fit into the notebook and glued down the page.
I added that tiny little Indian mailing stamp on the top left to add just a tiny bit more visual interest. That was the whole page: a quote I wanted to use, a gel print I already had, and one little extra bit up there in the corner.
Using what you’ve got
You can absolutely do this with stickers, washi tape, or anything else you’ve got on hand. The key is just to think about how you want to spotlight this supply. You could repeat a sticker shape across a page, make lines with your washi tape, or give whatever supply that you’re into right now a spot of its own.


If this is still feeling a little bit intimidating, it can easily be one of the times where you use a page you’ve seen before as inspiration. Seriously, feel free to just straight up copy one of these designs to put in your notebook. You can use the arrangement and choose from the things you already have.
And if you’ve picked your thing and you’re still sitting there wondering where it should go? Stick it down.
There have been so many times where I’m playing around with supplies, wavering back and forth between this side and that side—the top of the page or the bottom of the page—this color or that color. When I feel myself being too indecisive, or when I know that it’s just time to move on, I tell myself “just glue it down.” Make one decision, the rest of the decisions will follow.
Your Turn
Pick one thing you’d like to use in your notebook. It could be a creative supply, a photograph, a quote, or a random bit of ephemera you’ve saved. Give it a good look over and think about how you want to use it on your page. If a design you’ve seen would help you get started, use it.
Then put that first thing on the page and see what you want to do next. And if you catch yourself moving it from one side to the other over and over, you know what I’m going to say: just glue it down.