

Mixed Media Tags with Katie

Hi everyone! Katie here today! My favorite new thing to make is brightly colored mixed media tags. I've been instagramming photos as I make the tags and Kristin saw them and asked if I would like to share a little more about them, So here I am!
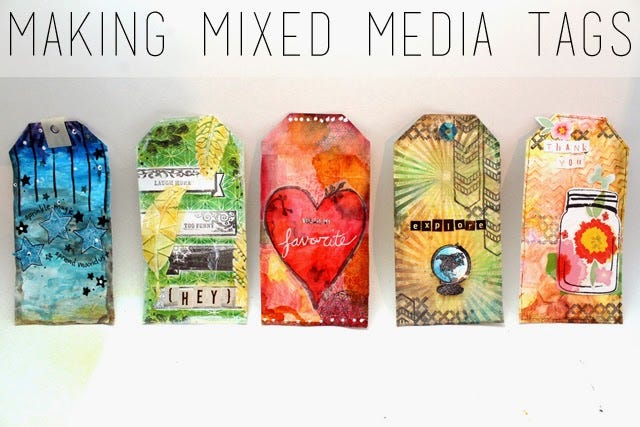
What I really love about tags is that they are the perfect size for me to try out new techniques and ideas before using them on larger projects. I like to play with a lot of messy mediums, like spray ink, Gelatos, and stamps so my tags are very mixed media and have a lot of layers.
Here are a few of my tips for making mixed media tags like these:
Start with a coat of gesso. While this isn't necessary, if you're using a bunch of wet mediums or colors, the gesso acts like a primer- the wet mediums will warp the paper less and the colors will be bolder and brighter.
Let the mediums dry between layers. Unless you're going for a "wet on wet" technique, it's helpful to let any wet mediums dry before moving on. If you're a bit impatient (like me) you can use a heat gun to speed up the drying.
It's all about the layers. I like to start with a background layer. That may be stamping or embossing or it may be a gelli print. After that, I'll add another layer using a different medium. (stenciling, stamping, etc.) I keep going until I'm happy and I decide that it's finished. My tags always have at least 3+ layers.
Try out new techniques! I've got a whole pinterest board on tag ideas, and another for artsy/art journal ideas. I like to find techniques on pinterest or blogs and then try them out on tags. You can even come up with your own techniques, that you think might work. If not, no biggie, Just go over it with a coat of gesso and try again.
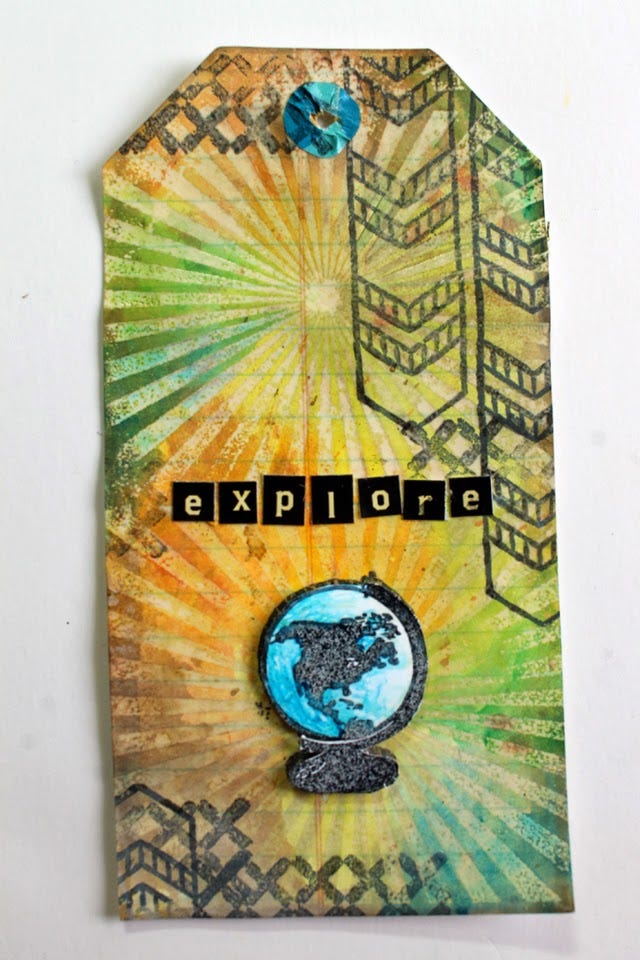
Here is a recent tag I made, followed by a tutorial on my process.
Supplies:
Background Stamp, Embossing Ink, Clear Embossing Powder, Spray Inks, Other Fun Stuff!
Step-by-Step
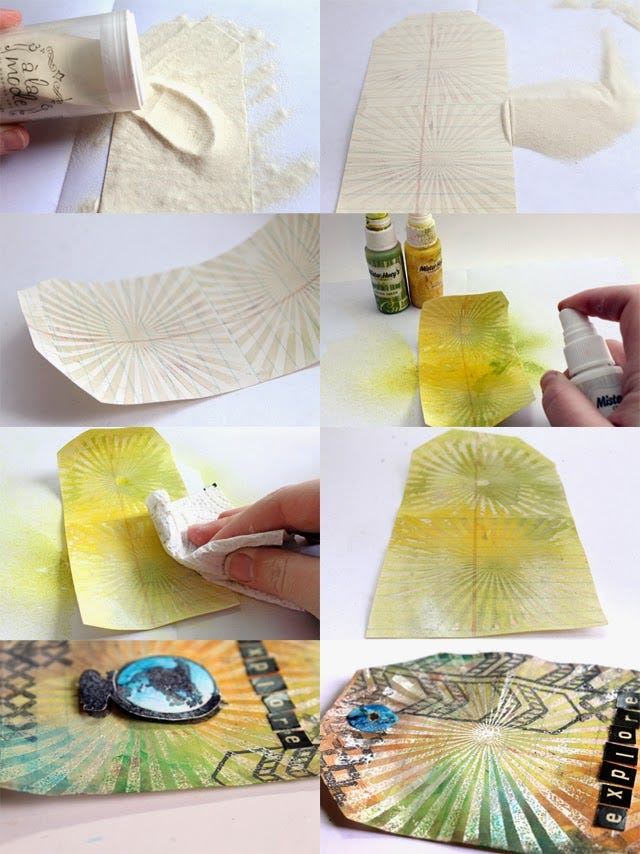
Using embossing ink, stamp your background stamp onto your tag. Shake clear embossing powder over your tag, being sure to cover it nicely.
Shake off all of the excess embossing powder onto another piece of paper.
Use a heat gun to emboss your stamped design.
Spray ink over top of your embossed design, playing with multiple colors.
Wipe a paper towel over your design to remove extra color from the embossed areas.
Let that dry and add any extra colors you want.
Finish embellishing! I did some black stamping, as well as adding on some letter stickers and distressing the edges.
New to stamping? Kristin has some FANTASTIC posts on stamping- Stamping 101, 5 Ways to be a Better Stamper. If you want even more ideas, stop by my "Tag" pinterest board.