

Share an Altered Art Journal with a Friend

Holiday gifts can be difficult, time-consuming, and expensive. Over the past two days I've shared a few projects that are a little more in-depth supply wise. Today I'm sharing a project that's a little less supply heavy, but a little bit more involved time-wise.
In today's project I'm sharing a step-by-step tutorial for altering a kraft mini-notebook with stamps. This is a low-budget, easy to replicate project that you can make for teachers, friends, or anyone you'd like to gift a thoughtful notebook to. When I gift this notebook I'm going to suggest that my friend use it as a writing or art journal to document her awesome lady life. I want to encourage all my friends, and all the women out there, that their stories are important and it's important to get it all down on paper.
Supplies Used:
Sticky Notes
Small Kraft journal
Black ink
Pink ink
[hr gap="15"]
Step One: Gather your supplies

Step Two: Using the label stamp, stamp the image onto a sticky note (so that the sticky area is on the reverse side of the stamped image)

Step Three: Cut out the label image and place it to the side.

Step Four: Using the label stamp again, stamp in the center of the journal.


Step Five: Place the stamped sticky note on top of the stamped image on the journal, try to match up the edges as best as you can.

Step Six: Using the large lined circle and starting in the upper left hand corner, I stamped multiple images along a (mostly) diagonal line from the top left corner to the bottom right corner.

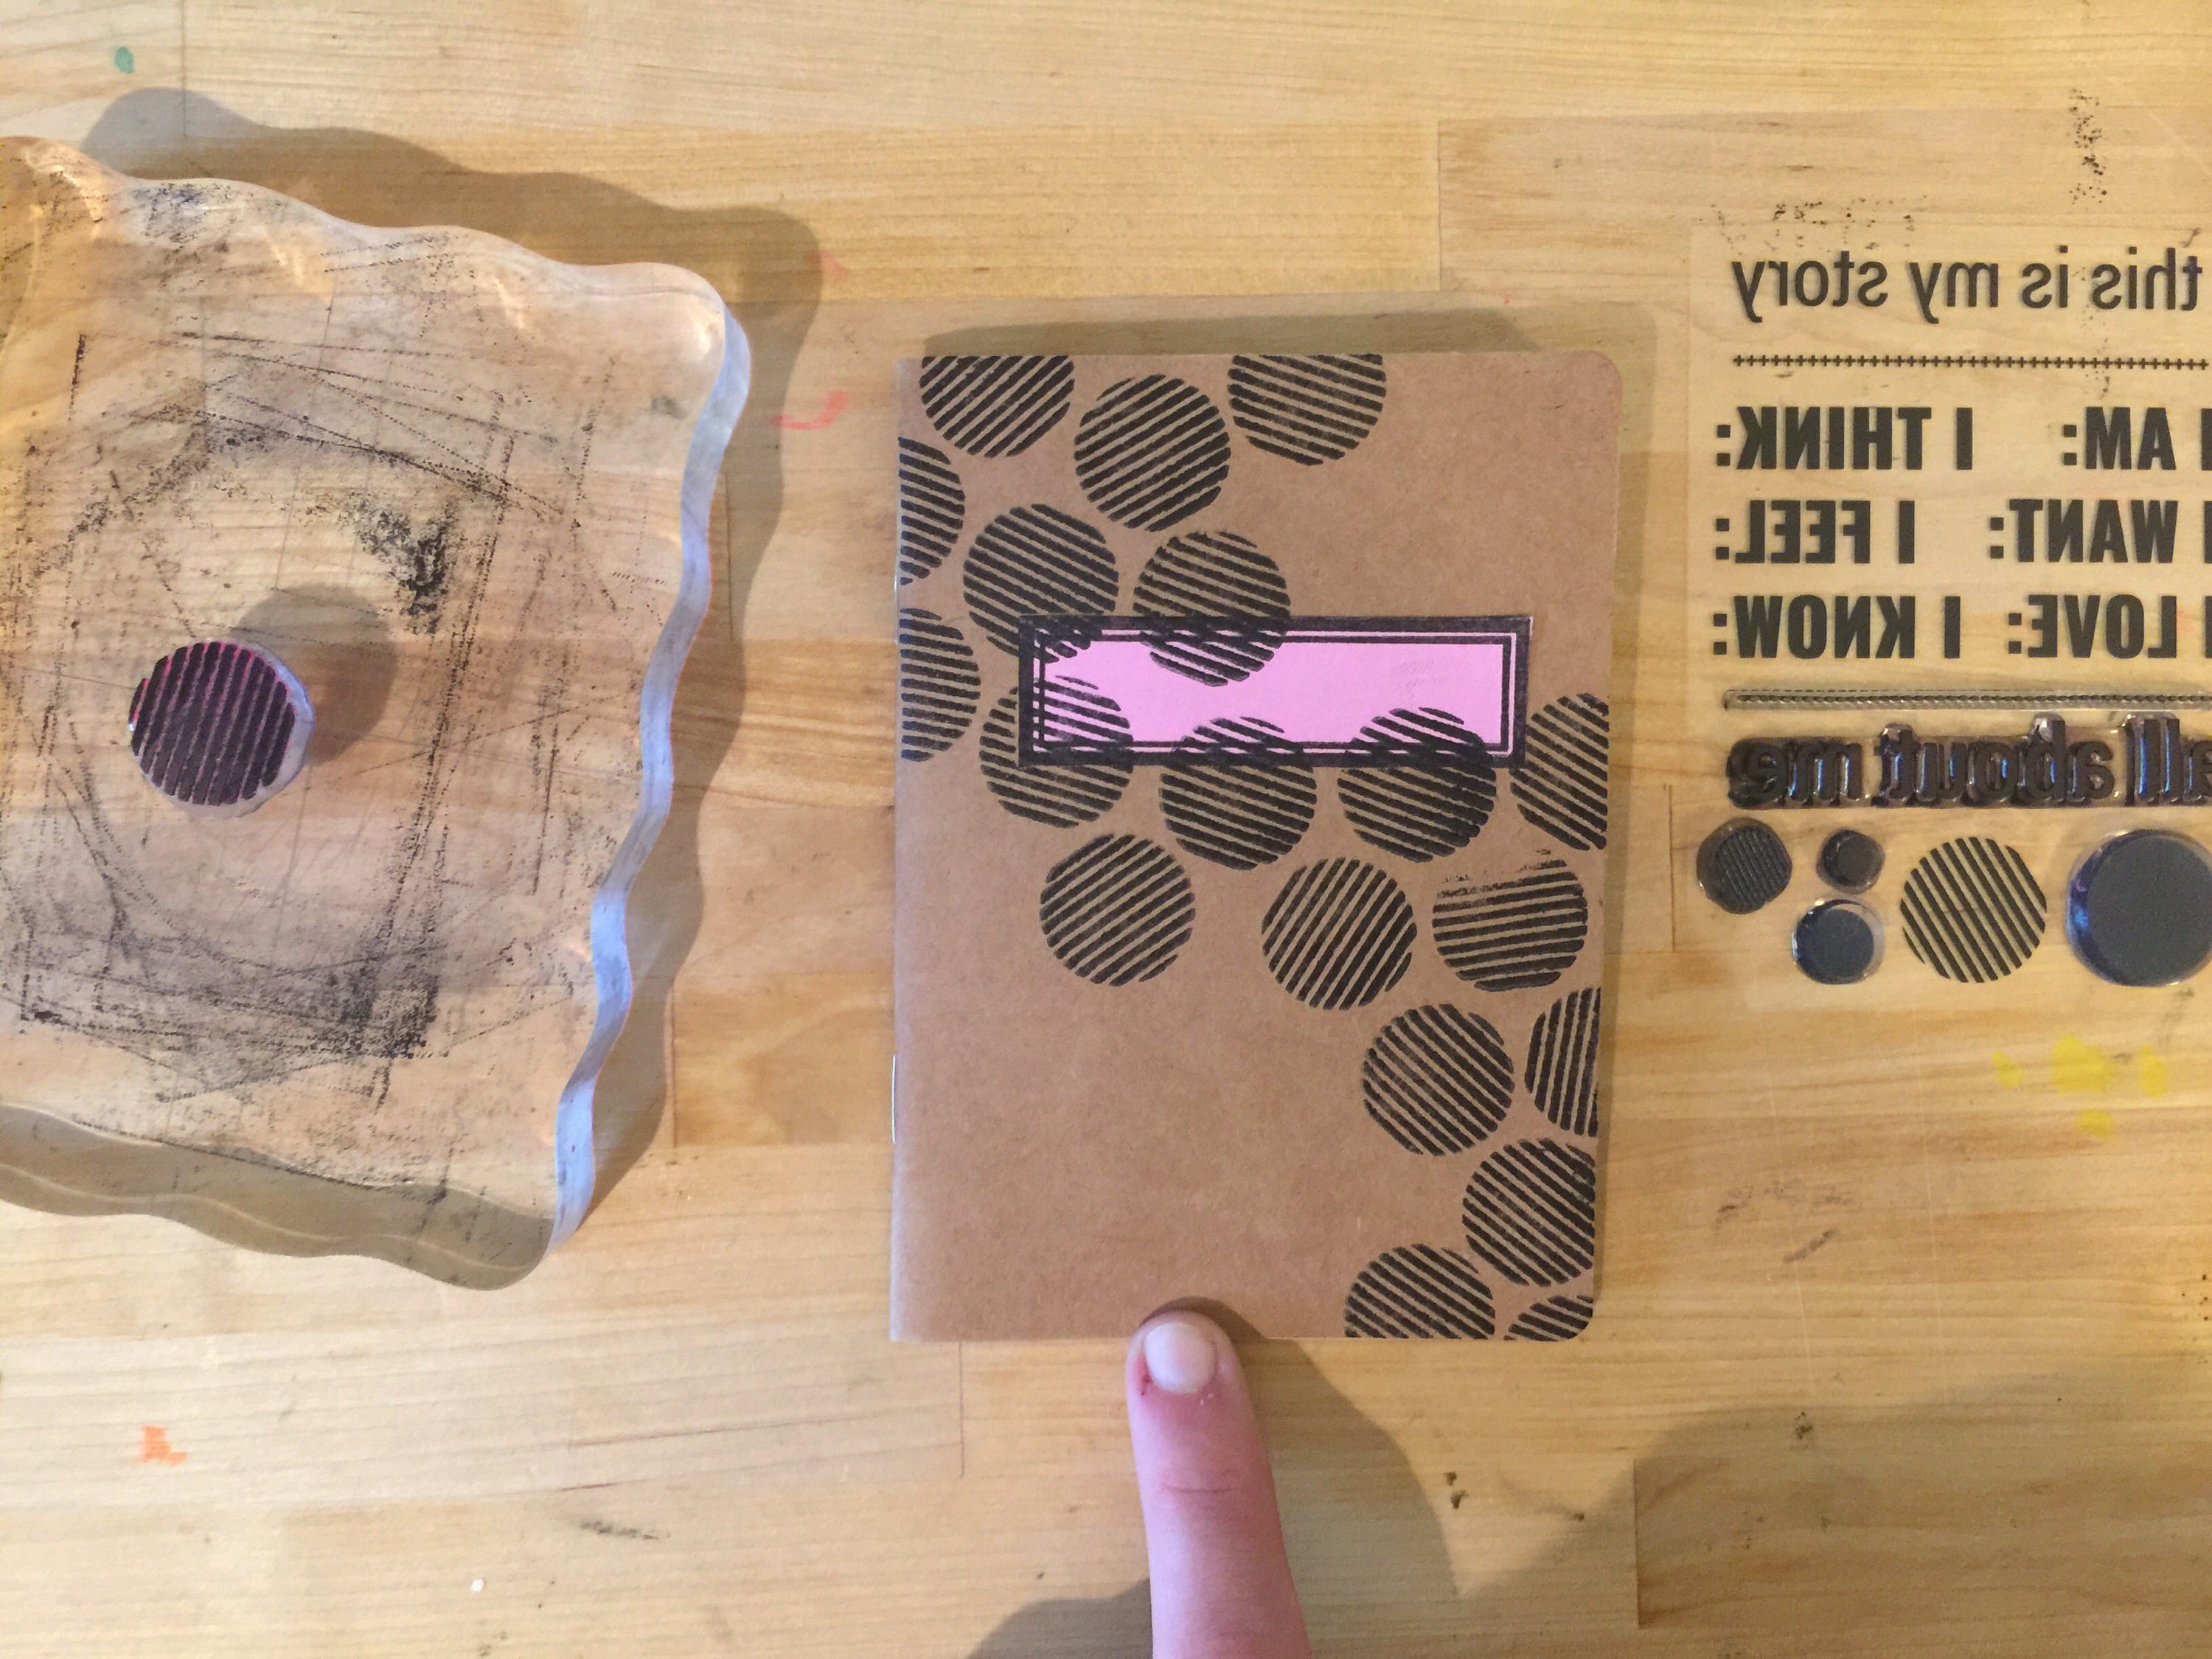

Step Seven: Using the smaller lined circle, I stamped in the rest of the area on the cover of the journal.

Step Nine: Using the solid circle stamp and pink ink, I stamped directly over each of the lined stamp images.

Step Ten: Remove the sticky note from the cover.

Step Eleven: The sentiment I wanted to use for the title (this is my story) was just slightly too large to fit into the label stamped area, so I decided to tape off half of it, so that I could just stamp the partial sentiment (my story). The instructions are as follows:

Using washi tape, tape over the area(s) of the stamp that you don't want to be seen. The only parts that should be left uncovered are the parts that you want to see on the page. Leave long trails of tape on either end. It's easier to do this part while it's already on the acrylic block.

Then ink your stamp as you normally would, covering the entire area with ink. When your stamp is sufficiently inked, remove the washi tape from the stamp.

Then stamp as you would normally. The area that was under the washi tape won't have any ink on it (make sure you start with a clean stamp, or you'll get residual ink on everything), so just pretend that part of the stamp isn't there.

Step Twelve: To finish up the book, I centered the my story stamp in the label area and left it to dry.

