This Body is Enough: DIY Mini-Album
Today’s guest post is from Awesome Ladies Creative Team member Vanessa. Vanessa is sharing a super cool feminist body positive mini-album tutorial that I'm pumped to share with you, and use to create one for myself.
Hi everyone, this is Vanessa aka dansmoncrane. Today I will be sharing a tutorial for a mini-album that helps you tell part of your story which was also inspired by a recent incident. This wasn’t a proud moment, but just like Kristin I think it’s really important to document your story, good or bad, embarrassing or not.
Last month, I travelled to Mexico for an art journaling workshop. At the Duty Free on the way back, the woman was wrapping my purchases and asked me how many months along I was. I had to explain to her that I am not pregnant. I was so flustered that I blurted ‘oh it’s because my son is really young’. That is a total lie, my son is 6. I was just very embarrassed and taken aback. When I told my husband the story he said ‘you should have said that you have two beautiful children’ (and that’s why he’s a keeper!).
This incident (it actually happens to me a lot) really made me think about my body and about how my first reaction was to justify myself. Why is that? Why can’t I be more proud of my body and what it has accomplished? That lead to an idea: making a body affirmation mini album.
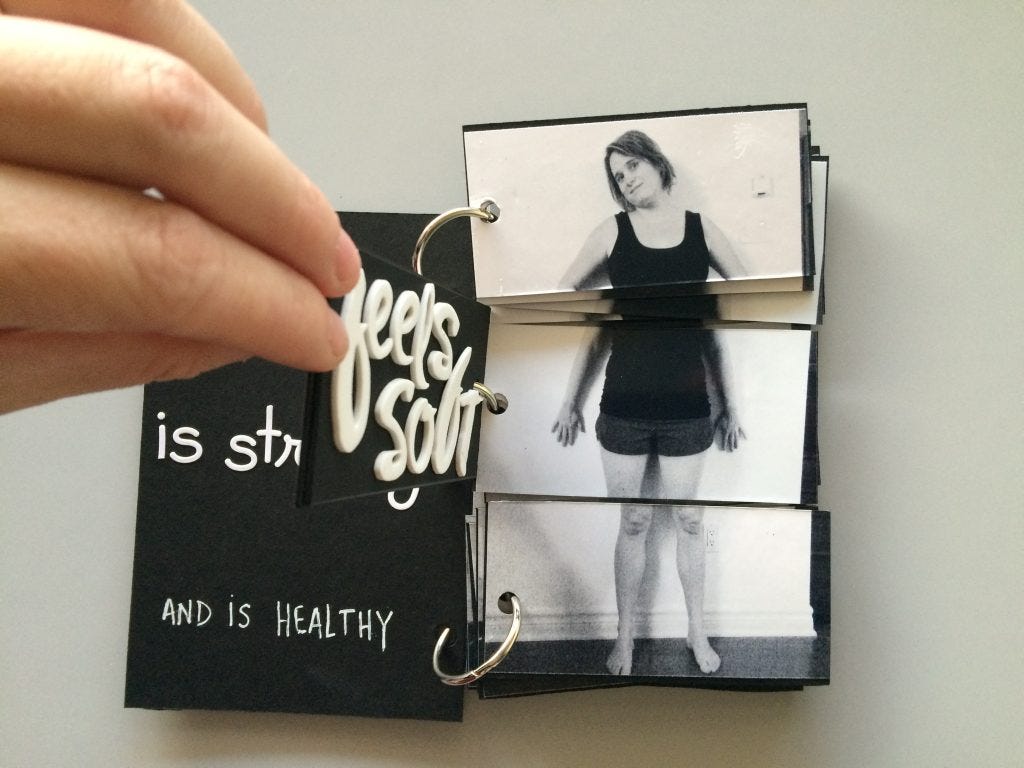
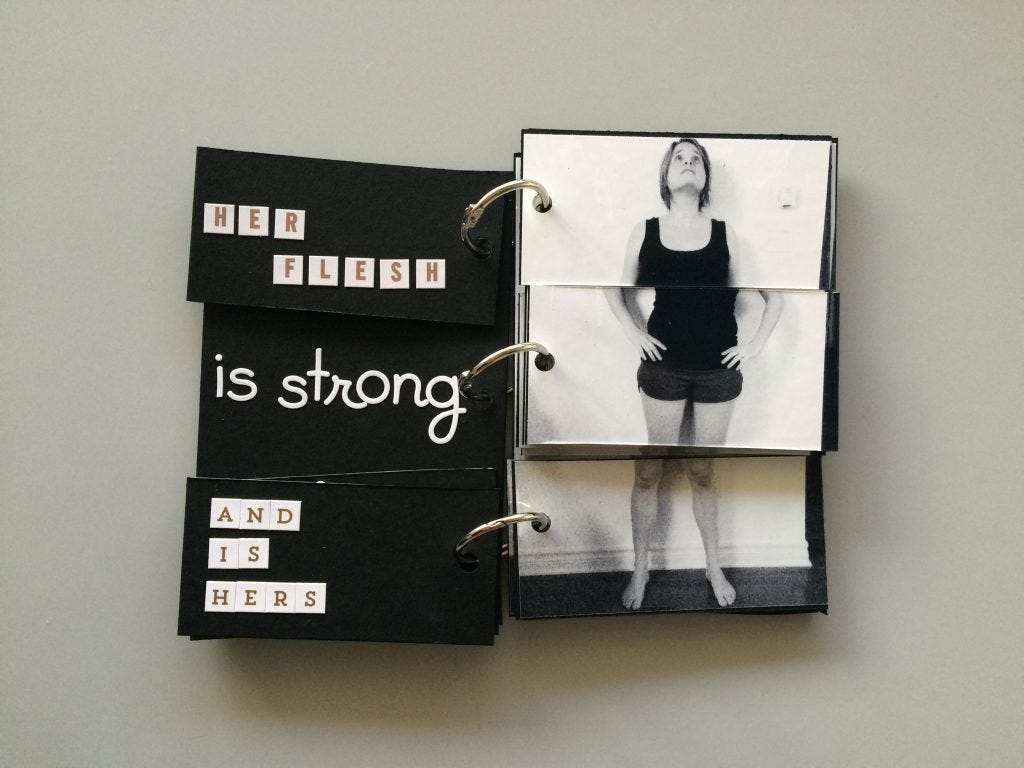
Maybe you had this type of book when you were a child: there would be an image of an animal or person on the right, split in three and some words on the left. By flipping only part of a page you could create new creatures and new stories within the same book. This was the base idea for my mini-album only I decided to use pictures of myself.
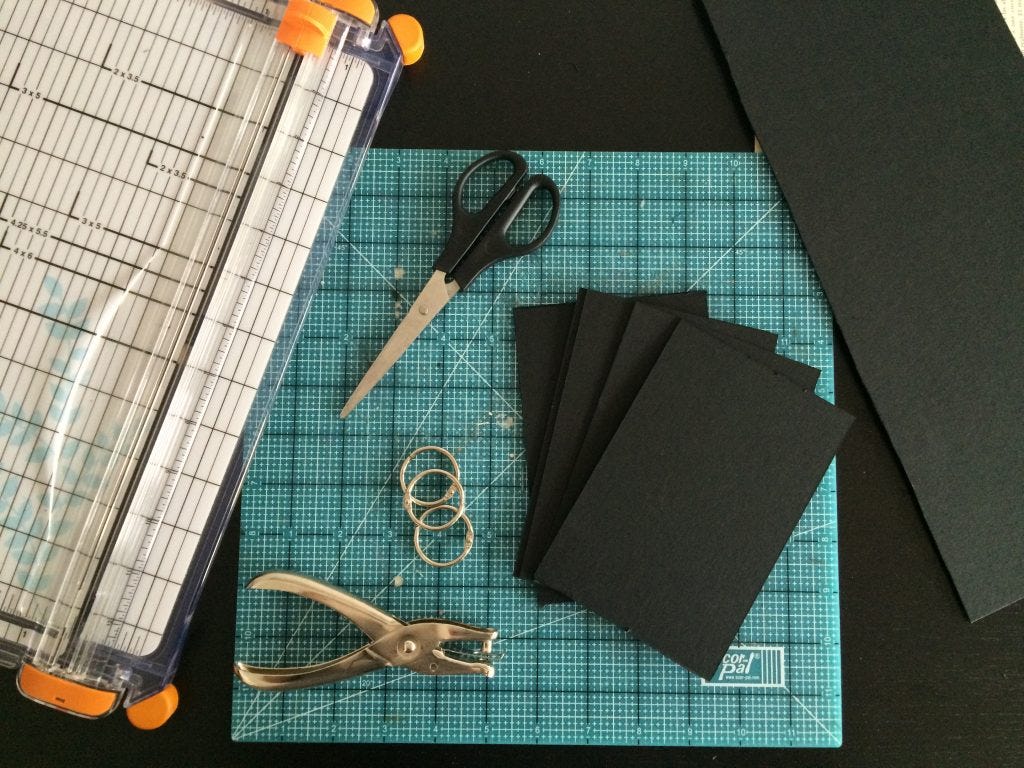
Gather your supplies (use the handy supply list at the end of this post to help you out and to see what products I used!)
Before you start assembling your album, you’ll need to take five photos of yourself. You should position yourself against a blank wall if you can and try to hold the same position, but with subtle variations. For example, I switched my arm positions and my head. Then, use a photo editing program to apply the same filters to your images so they all look the same (I used Pic Tap Go on my iPhone). Print them out in the 4 x 6 inch format.
1. Prepare your cardboard
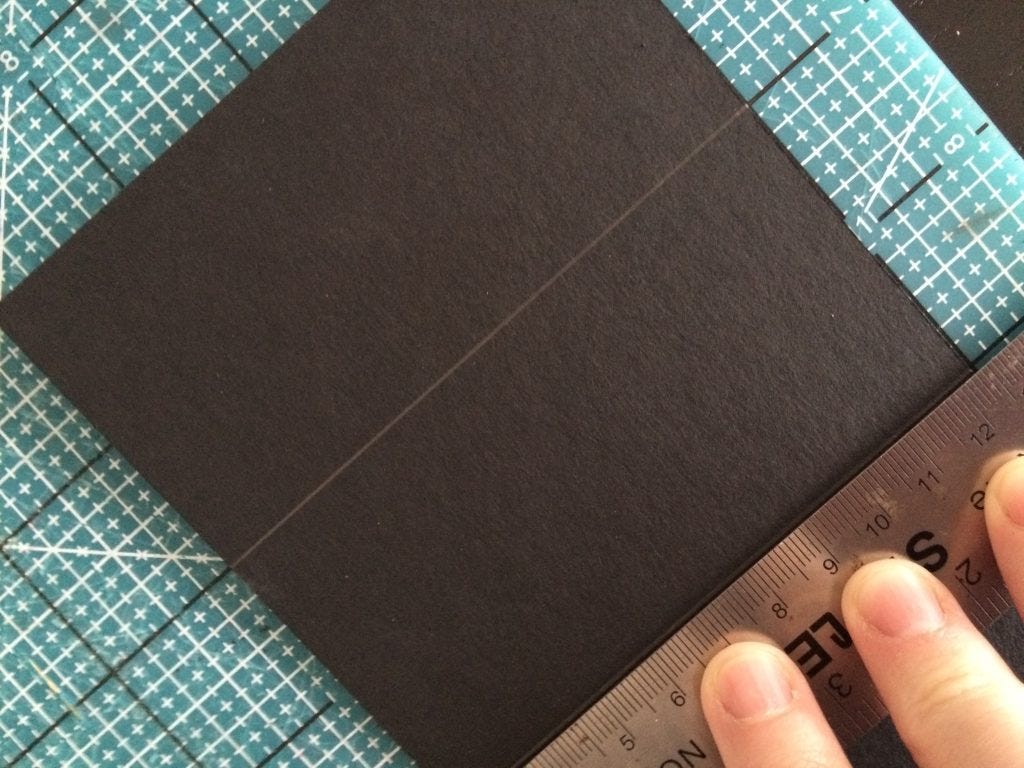
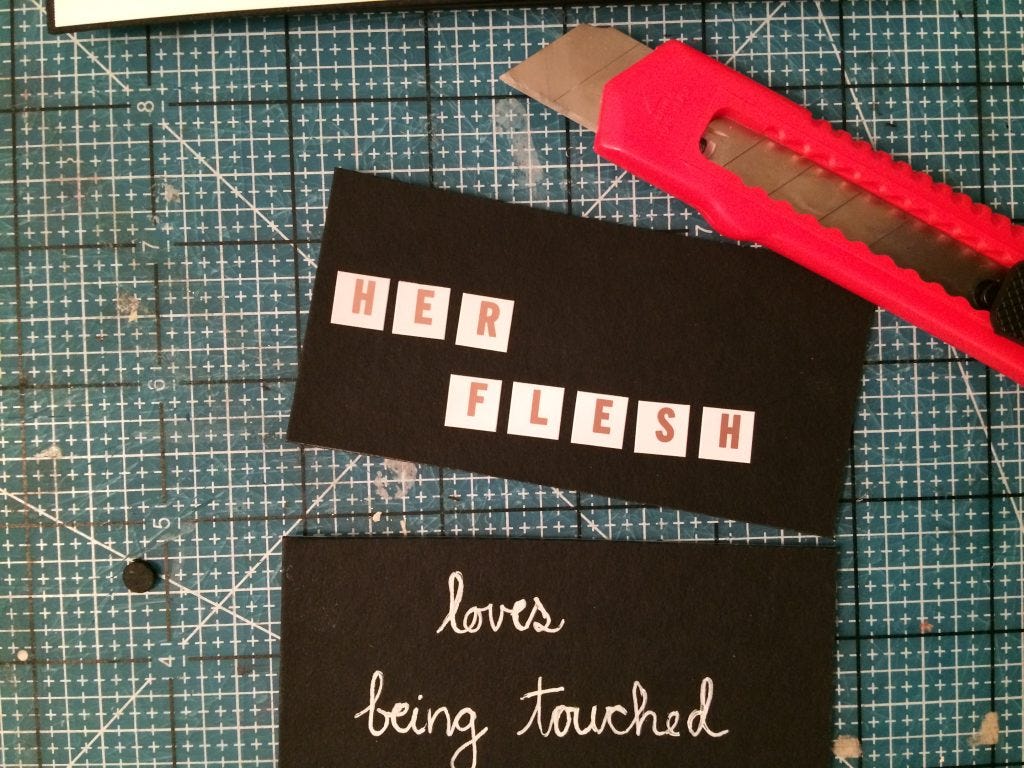
Cut down your cardboard so you have six 4 x 6 inch pieces. On one side of five of them, using the guidelines on your mat and your ruler, split each page into three 4 x 2 inch segments. You need only do this on one side because the other one will be covered by your photo. You leave one piece of cardstock out because this will be the back cover and will only hold a photo.
2. Write down the story
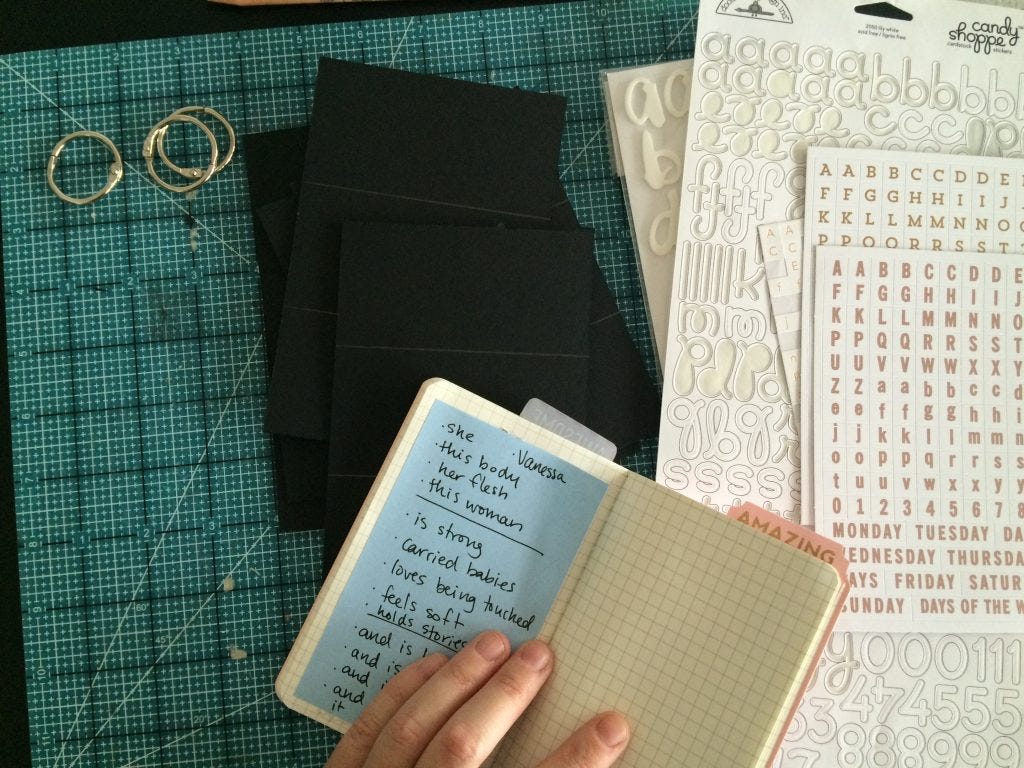
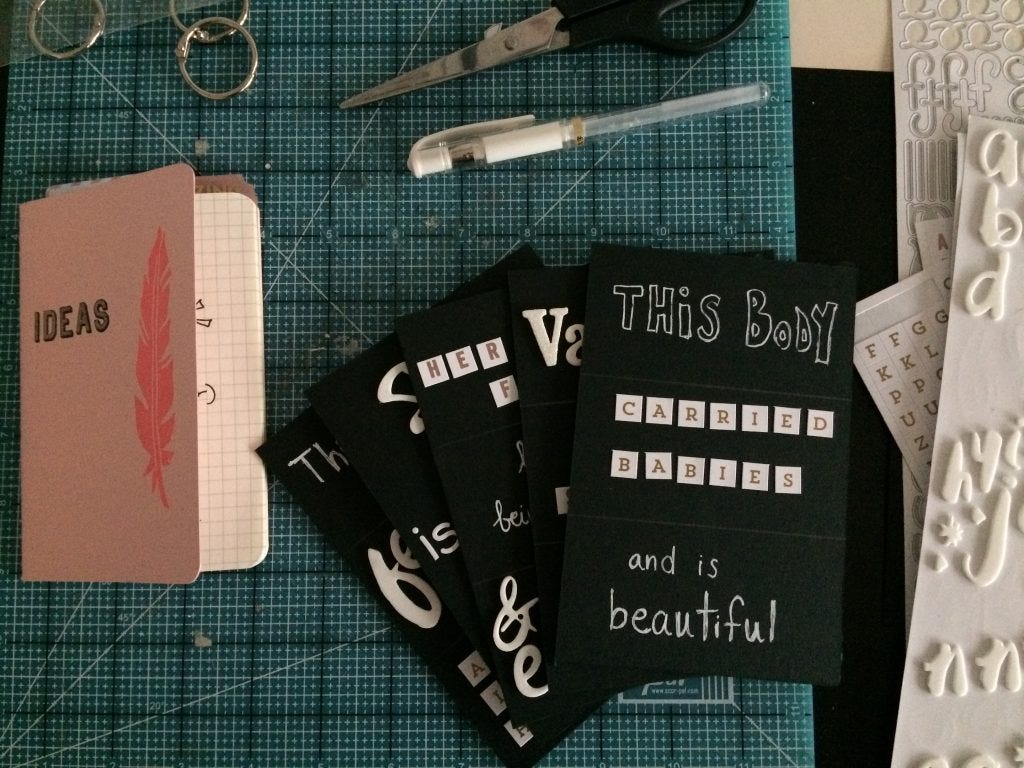
The next step is to write down five sentences that will tell the story for you. I wanted to write a positive message about my body and what it can do. By all means, choose the theme that you want to document and write it out, good or bad. You’ll want to write sentences that can be split in three parts that can be interchangeable and still make sense. In my case, I used a third-person subject (‘this body’, ‘her flesh’, etc.) for the top tier, an active verb (‘is strong’, ‘carried babies’, etc.) for the middle and a second idea (‘and is better for it’, ‘and is beautiful’, etc.) for the bottom tier. Once this is done, bring on the alpha stickers!
Write down your phrases using your alpha stickers and your gel pen (my cardboard was black so I used a white one) and write down your sentences in the appropriate segments of the five pages. Remember that one piece of cardboard will have no words on it, this one will be the last page.
3. Glue the pictures
Choose which page will be your cover, leave the top blank and place it aside. Now you can start adhering your pictures to the topside of your pages. There should be a picture on top and the words underneath. The last picture goes on the piece that you set aside as the bottom cover. It should have the picture on top and no words underneath. The cover should have no image on the top and words underneath.
4. Punch holes
Using the guidelines on your mat, mark the places where you will punch your holes. The holes should be on the right side of the words page. Remember that each piece of cardboard, once cut, will be 2 inches high, so the hole should go at the one inch, three inch and five inch mark starting from the top. Punch out these holes for all pages. Now take your cover and place it on your rings, so that the blank side is underneath. Take you back cover and place it on the rings, so that the photo is on the top; this way, both end covers are in position.
5. Cut the pages and assemble
Now pick up your remaining middle pages. Take out your exacto knife and ruler and start cutting up your pages. I would recommend putting each part of the page onto the rings so you don’t lose the order of the sentences.
The picture should be on the top of the page and the words underneath. This will ensure that you have the words on the left and the images on the right when you flip through your mini-album. Once you have placed all of your images on the rings, close them and decorate your cover. I chose to keep mine simple, with just the word ‘body’ on it.
Here is a quick flip through of my album:
I can see this technique being used in so many different ways! I chose to put a positive spin on a touchy subject for me but you may want to tell a different story. It’s a great way to commemorate a happy event like a shower, a birthday party or even a visit with Santa. It could be fun to use pictures of different people so that the new people created become unique. What part of your story would you document in this fashion? Would you keep it playful or more serious?
Supply List:
Paper:
Heavy black cardboard cut in six 4 x 6 inch pieces
Embellishments:
Amy Tangerine Thickers (2 types)
MME alpha stickers
Studio Calico alpha stickers
Tools/Craft supplies:
Matte medium (as an adhesive)
Crop-o-Dile hole punch
Exacto knife
Three metal rings (or ribbon or twine)
White Uni-Ball Signo pen
Pencil and ruler
Paper Trimmer
Mat
Misc:
5 photos of yourself
5 sentences telling the story you want to document


